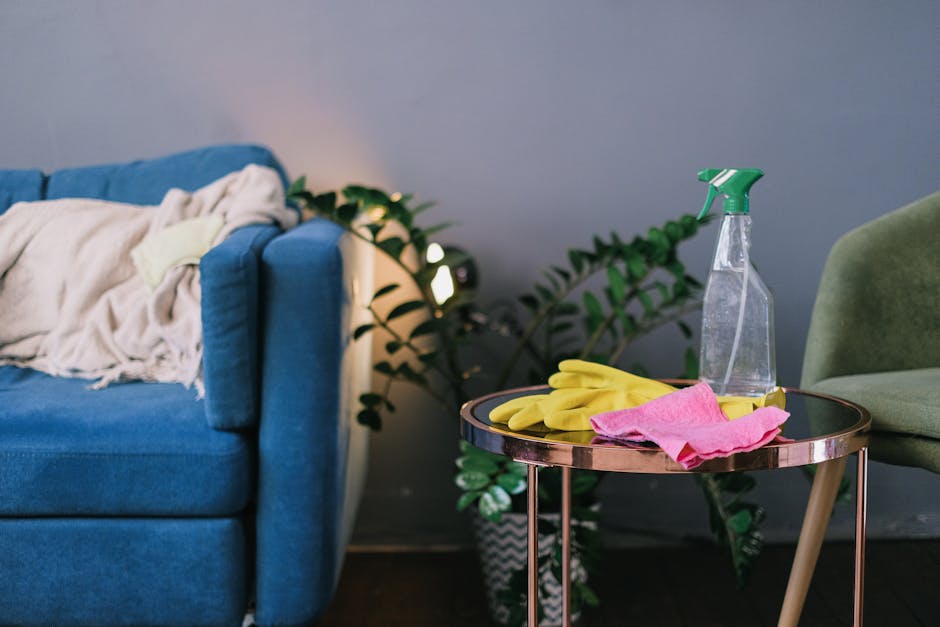
Chalk Farm end of tenancy clean checklist for landlords
If you are a landlord in Chalk Farm, you already know the awkward part of move-out day is not the key handover. It is the cleaning. A property can look fine at first glance and still fail a check-out inspection because of greasy oven trays, skirting dust, limescale in the bathroom, or a carpet that has quietly taken on a winter of foot traffic. This Chalk Farm end of tenancy clean checklist for landlords is designed to help you stay ahead of those details, avoid avoidable disputes, and hand over a property that feels properly looked after.
Truth be told, most cleaning problems are not dramatic. They are small things, missed in corners and behind appliances, that add up fast. The good news? With a clear process, you can tackle them methodically and save yourself a lot of back-and-forth later. Below you will find a practical landlord-focused checklist, plus guidance on what matters most, what to watch out for, and when it makes sense to bring in a professional end of tenancy cleaning service for a more thorough finish.
Table of Contents
- Why Chalk Farm end of tenancy clean checklist for landlords matters
- How the clean works in practice
- Key benefits and practical advantages
- Who this is for and when it makes sense
- Step-by-step guidance
- Expert tips for better results
- Common mistakes to avoid
- Tools, resources and recommendations
- Law, compliance, standards, and best practice
- Options, methods, and comparison table
- Case study or real-world example
- Practical checklist
- Conclusion
- Frequently asked questions
Why Chalk Farm end of tenancy clean checklist for landlords Matters
End of tenancy cleaning is one of those tasks that looks simple on paper and then expands the moment you open the oven, inspect the bathroom sealant, or notice the outline of a sofa that never quite moved. For landlords in Chalk Farm, the standard matters because tenant turnover is where property presentation, wear and tear, and deposit discussions all collide. A good clean does not just improve appearance. It supports a fair handover and sets the tone for the next tenancy.
Chalk Farm properties are often busy homes with steady footfall, shared entrances, and all the ordinary signs of everyday life: cooking smells in the kitchen, dust around radiators, marks on walls, the odd scuff near the hallway. None of that is unusual. But if you do not tackle it properly, it can become the reason a new tenant arrives to a property that feels tired before they have even unpacked. Not ideal, obviously.
From a landlord's point of view, the checklist is useful because it turns a stressful final inspection into a controlled process. You can see what has been cleaned, what still needs attention, and whether any specialist work is needed. It is also a useful way to compare the property against the inventory, room by room, rather than relying on memory or a quick walk-through that misses half the detail.
Expert takeaway: the best end of tenancy cleans are not about making a place smell pleasant for five minutes; they are about removing the sort of hidden dirt that shows up the moment daylight hits a window or a letting agent runs a finger along a shelf.
How Chalk Farm end of tenancy clean checklist for landlords Works
A reliable landlord clean follows a clear sequence. You start with the biggest mess and work towards the smallest details. That sounds obvious, but in practice people often jump around: a bit of bathroom here, a bit of kitchen there, then suddenly they have run out of time and the skirting boards are still dusty. A checklist keeps the job orderly.
Usually the process begins with a walk-through. Check the property in natural light if possible, because early morning or late afternoon can hide dust and streaks in a way that is very annoying later. Note any damage separately from cleaning issues. A burnt hob ring is a cleaning matter; a cracked tile is not. That distinction helps avoid confusion when reviewing the deposit or arranging repairs.
Next comes the deep clean itself. In a tenancy turnover, this usually means more than a quick tidy. Think oven degreasing, descaling taps, wiping internal cupboards, clearing extractor covers, cleaning behind and beneath furniture where accessible, and dealing with carpet or upholstery spots. In many homes, the biggest difference comes from the things nobody sees immediately: tops of doors, light switches, the underside of kitchen handles, the inside edge of the fridge seal. Tiny places. Big effect.
Finally, you do a post-clean inspection. This is where the checklist earns its keep. You are not just looking for shine; you are checking consistency. If the kitchen is spotless but the bathroom mirror is streaky, the property can still feel unfinished. Small imbalance, big impression.
Key Benefits and Practical Advantages
A proper landlord checklist brings more than visual polish. It gives you structure, accountability, and a better chance of handing the property over without avoidable friction. Let's face it, a messy move-out can become a lot more expensive than the clean itself if it leads to delays or tenant complaints.
- Clearer inspections: you can compare each room against the inventory without guessing what was cleaned and what was missed.
- Smoother re-letting: a fresh, well-kept property photographs better and feels ready for the next tenant.
- Fewer disputes: when cleaning expectations are documented, there is less room for disagreement.
- Better maintenance visibility: cleaning often reveals minor issues such as leaks, worn seals, mould spots, or hidden damage.
- More professional presentation: even small touches, like streak-free windows or a dust-free window sill, make a place feel cared for.
There is also a practical benefit many landlords underestimate: time. If you manage more than one property, a repeatable process prevents every move-out from becoming a small emergency. You know what to check, in what order, and which tasks are worth doing yourself versus outsourcing. That alone can save a fair bit of stress.
If you want a more thorough reset rather than a basic surface clean, a deep cleaning approach can be a smart match, especially where the property has had a long tenancy or has seen heavy kitchen and bathroom use.
Who This Is For and When It Makes Sense
This checklist is most useful for private landlords, property managers, and letting agents handling a move-out in or around Chalk Farm. It is especially helpful if you manage furnished properties, HMOs, flats with shared areas, or homes that turn over quickly between tenancies. The more moving parts there are, the more useful a room-by-room process becomes.
It also makes sense in these situations:
- the tenant has left a basic tidy but not a proper end of tenancy clean;
- you need to prepare for viewings within a tight window;
- the property includes carpets, rugs, sofas, or mattresses that need specialist attention;
- you want to document the condition carefully before the next tenancy starts;
- there has been longer-than-normal occupancy, pets, smokers, or heavy cooking use.
For landlords who also use the property for short lets between longer tenancies, a more flexible approach may be needed. In some cases, Airbnb cleaning standards can be helpful as a reference point for speed, presentation, and attention to guest-facing details. Different use case, same principle: the space must feel fresh, safe, and ready.
And if the property is still occupied for part of the clean, or if you are coordinating move dates with trades, cleaners, and inventory clerks, a practical move out cleaning plan can help you sequence everything without tripping over yourself. Happens more than you would think.
Step-by-Step Guidance
A good end of tenancy clean works best when you break it into zones. The order below is not the only way to do it, but it is sensible and easy to follow. If you are managing the work yourself, or briefing a cleaner, this is a useful framework.
-
Start with ventilation and waste removal.
Open windows where possible, remove rubbish, and clear loose items. A clean space is much easier to assess once clutter is gone.
-
Work from top to bottom.
Dust high shelves, light fittings, tops of doors, curtain poles, and picture rails before moving down to surfaces, skirting boards, and floors. That way, dust does not fall onto areas you have already cleaned.
-
Handle the kitchen with extra care.
Degrease cupboards, clean the hob, oven, splashback, fridge, freezer, extractor fan, sink, taps, and handles. Check inside drawers and under removable trays. Kitchens tend to be the make-or-break room.
-
Tackle bathrooms properly.
Descale shower screens, taps, and tiles. Clean around the toilet base, behind the sink pedestal if accessible, and remove mould or soap scum where possible. Fresh grout lines do a lot of heavy lifting here.
-
Clean bedrooms and living areas.
Wipe wardrobes, shelves, switches, radiators, window frames, and sills. Lift accessible furniture and check behind beds, sofas, and side units. If the property has soft furnishings, consider specialist help such as sofa cleaning or upholstery cleaning when stains or odours remain.
-
Inspect flooring last.
Vacuum thoroughly, then mop hard floors and pay attention to corners, thresholds, and edges. If the property has pile carpets, a professional carpet cleaning treatment may be the difference between "looks okay" and "actually ready".
-
Finish with windows and final detailing.
Clean internal glass, window tracks, mirrors, and any visible marks. Window smears are a classic final-stage miss. Also check for fingerprints around doors and frames. Those little marks always catch the eye at the worst moment.
One practical note: if you are coordinating the clean on the same day as the inventory, leave a buffer. A rushed final pass is where small things slip through. It is usually not the sweeping that trips people up. It is the details around the sweeping.
Expert Tips for Better Results
A few habits make the whole process cleaner, quicker, and more reliable. They are not glamorous. They work, though.
- Photograph the property before and after: this helps if there is a later disagreement about condition or cleanliness.
- Use daylight where possible: bathroom streaks and dust on dark surfaces are much easier to spot in natural light.
- Check touchpoints twice: switches, handles, bannisters, cupboard edges, and appliance fronts are easy to miss and easy to see.
- Separate cleaning from repairs: do not waste time trying to scrub away damage. Mark it, report it, move on.
- Focus on smell as well as sight: stale cooking or damp odours can make a property feel unclean even when it looks decent.
- Plan specialist tasks early: oven, carpet, mattress, and window work can need more time than a basic surface clean.
If you are trying to get the place ready quickly, a one-off cleaning visit can be a sensible middle ground. It is especially useful when a property needs a concentrated reset but not a full ongoing contract.
And for homes where the bed frame, mattress, or guest bed area has seen years of use, mattress cleaning is worth considering. A clean mattress is one of those quiet trust signals. Nobody says much about it, but everyone notices it.
Common Mistakes to Avoid
Most end of tenancy cleaning issues come from rushing, assuming, or focusing on the wrong room first. It is a bit like tidying a desk by shoving everything into a drawer. Looks fine for about thirty seconds.
- Missing the hidden areas: behind radiators, under the sink, inside extractor covers, and at the back of cupboards are frequent problem spots.
- Cleaning over damage: scuffs, cracks, broken seals, and water leaks need separate handling.
- Skipping the oven: a greasy oven is one of the fastest ways to fail a final check. It's just one of those things.
- Forgetting windows and frames: clean glass alone is not enough if the tracks and sills are dusty.
- Using the wrong products: harsh chemicals can stain surfaces, strip finishes, or leave residue that attracts more dirt.
- Leaving everything until the last hour: that is how detail work gets lost.
Another common mistake is treating the clean as a tenant problem only. Even if the tenancy agreement places responsibility on the outgoing occupier, landlords still benefit from checking the result carefully. If the standard is not there, it is better to catch it before the new tenant steps in.
Tools, Resources and Recommendations
You do not need specialist equipment for every task, but the right basic kit makes a big difference. A landlord clean is smoother when you have the right tools ready before you begin.
| Task | Useful tool or product | When to consider professional help |
|---|---|---|
| Kitchen degreasing | Microfibre cloths, non-abrasive degreaser, scraper for safe use | When grease is baked on or the oven is badly neglected |
| Bathroom descaling | Limescale remover, old toothbrush, sponge, squeegee | When taps, screens, or grout have heavy build-up |
| Floors and carpets | Vacuum with attachments, mop, spot cleaner | When stains, pet odours, or flattened pile remain |
| Soft furnishings | Fabric-safe cleaner, lint roller, fabric brush | When upholstery has visible marks or lingering smells |
| Windows and glass | Glass cleaner, lint-free cloth, blade for suitable surfaces | When access is awkward or streaks keep returning |
For landlords who prefer outsourcing, it is sensible to compare the scope of work rather than just the headline price. A proper quote should make clear what is included, what is optional, and whether specialist add-ons like carpet or oven work are extra. You can review pricing and quotes before deciding how much of the job to hand over.
If you want to understand the company side of things before booking, pages such as about us, insurance and safety, and health and safety policy can be useful for checking how a provider approaches responsibility and risk. That may sound dry, but on move-out day, dry and clear is exactly what you want.
Law, Compliance, Standards, and Best Practice
For UK landlords, the main thing is to keep cleaning expectations fair, consistent, and tied to the actual condition of the property. A final clean should not become a vague excuse for deductions that are not supported by evidence. Inventory records, dated photographs, and a room-by-room checklist all help you stay on firm ground.
It is also good practice to separate fair wear and tear from genuine cleanliness issues. A lightly worn carpet in a busy hallway is not the same thing as a stained carpet that needs treatment. Likewise, some marks on paintwork may be normal over time, while greasy kitchen surfaces are very clearly a cleaning job. The cleaner the distinction, the fewer headaches later.
Landlords should also think about safety during cleaning. If mould, bodily fluids, broken glass, or sharp debris are present, the clean may need extra care. In those cases, a professional team with proper procedures is often the safer choice. If the property has been heavily neglected or has post-refurbishment dust, after builders cleaning may be more appropriate than a standard end of tenancy clean.
Finally, if your property management approach includes regular upkeep between tenancies, combining turnover cleans with routine care can reduce the size of the job each time. Services like regular cleaning or domestic cleaning can help keep the place in better condition throughout the year, which is quietly one of the best landlord habits going.
Options, Methods, and Comparison Table
There is no single right way to handle a Chalk Farm end of tenancy clean. The best option depends on the property, the turnaround time, and the level of finish you need. Here is a simple comparison that can help you decide.
| Method | Best for | Pros | Limitations |
|---|---|---|---|
| Landlord self-clean | Small flats, light soil, plenty of time | Lower direct cost, full control, easy to inspect as you go | Time-consuming, easy to miss detail, physically demanding |
| Tenant-led clean with landlord inspection | Tenancies with clear cleaning expectations | Can work well if standards are good and the property is well maintained | Quality can be uneven, may still require a follow-up clean |
| Professional end of tenancy clean | Fast turnover, heavy use, higher presentation standards | More thorough, usually better for kitchens, bathrooms, and hidden detail | Higher upfront spend, still needs clear instructions |
| Targeted specialist add-ons | Carpets, ovens, mattresses, sofas, windows | Focused results where ordinary cleaning falls short | Requires good judgment about what actually needs specialist treatment |
In practice, many landlords end up using a mix of methods. For example, you might handle the general clean yourself, then bring in specialists for carpets or ovens. That can be the sweet spot when the property is mostly tidy but a few parts need more muscle. If windows are a recurring issue, window cleaning is another practical add-on that can brighten the whole space quickly.
Case Study or Real-World Example
Here is a very ordinary, very real kind of situation. A landlord with a two-bedroom flat near Chalk Farm Road gets notice from tenants who have lived there for several years. The flat is not trashed. Not at all. But the kitchen has built-up grease around the extractor, the oven has old splatter marks, and the living room carpet has a faded traffic lane from the sofa to the hallway. The bathroom looks clean enough at a glance, yet the shower screen tells a different story once the afternoon light catches it.
Rather than treating the clean as one big task, the landlord works room by room. The oven gets a specialist clean. The carpet gets treated for spots and overall freshness. The bathroom receives a full descale and detail clean, with extra attention to glass edges and taps. Windows and skirting boards are finished last. By the time the inventory is done, the property feels balanced: not brand new, because that would be silly, but properly cared for and ready.
The small win here was not perfection. It was control. There was a clear record of what had been cleaned, what had been repaired separately, and what was simply normal wear and tear. That made the handover calmer than it might have been. Which, if you have ever dealt with move-out day, is worth a lot.
Practical Checklist
Use this checklist as your final pass before handover. If something is not ticked, it probably needs attention. Simple, but effective.
- Entrance and hallway: floors vacuumed or mopped, skirting boards wiped, walls checked for marks, light switches cleaned, doors and handles wiped, cobwebs removed.
- Living room: dust removed from shelves, radiators, sockets, picture rails, and window sills; soft furnishings checked; carpets or rugs cleaned; mirrors and glass polished.
- Kitchen: oven degreased, hob cleaned, extractor cleaned, cupboard fronts wiped, inside cupboards checked, sink and taps descaled, fridge and freezer cleaned, bins emptied and sanitised.
- Bathroom: toilet cleaned inside and out, shower screen and tiles descaled, bath and sink cleaned, grout checked, mirrors polished, mould or soap residue dealt with.
- Bedrooms: wardrobes and drawers wiped, mattress and bed frame checked, floors cleaned, windowsills dusted, any wall marks noted separately if they are not cleaning issues.
- Utility areas: appliances cleaned, shelving wiped, pipework checked for leaks or staining, floors and corners cleared of debris.
- Floors throughout: carpets vacuumed, hard floors mopped, edges and corners checked, stains spot-treated where possible.
- Windows and glass: internal panes cleaned, frames and tracks wiped, mirrors streak-free, handles polished.
- Final checks: bulbs working, evidence of damage recorded, rubbish removed, keys ready, photos taken, inventory matched.
Quick landlord summary: if the kitchen, bathroom, floors, and windows are right, most of the property will feel right too. That is the bit people notice first.
Get a free quote today and see how much you can save.
Conclusion
A well-run Chalk Farm end of tenancy clean does not need to be complicated, but it does need to be deliberate. The difference between a passable clean and a proper handover often comes down to structure: checking the property methodically, paying attention to the hidden spots, and knowing when a specialist service is the smarter choice. For landlords, that structure is what reduces stress and keeps the whole move-out process on track.
If you remember only one thing, make it this: do not judge the property by the first glance. Judge it by the corners, the edges, the handles, and the places people forget. That is where the real story is. And once those details are handled, the rest tends to fall into place rather nicely.
When the keys are handed over and the flat finally feels calm again, that small sense of order is a good feeling. Worth aiming for, every time.
Frequently Asked Questions
What should a landlord check first after tenants move out?
Start with the kitchen and bathroom, then move through floors, windows, and high-touch surfaces. Those areas usually reveal the true condition of the clean fastest, and they matter most during inspections.
Is an end of tenancy clean the landlord's responsibility or the tenant's?
It depends on the tenancy agreement and the agreed handover process, but landlords still need to inspect the result. Even when the tenant is meant to clean, the final standard affects the next tenancy.
How clean should a rental property be before a new tenant moves in?
It should be visibly clean, fresh, and ready for normal use. That usually means no grease, dust, sticky residue, unpleasant smells, or obvious marks in key areas like the kitchen, bathroom, and floors.
Do landlords need to hire professionals for end of tenancy cleaning?
Not always. Smaller or lightly used properties may be manageable in-house. But professional help is often worth it where time is short, the property is large, or specialist tasks like ovens and carpets need attention.
What are the hardest areas to clean properly?
Kitchens and bathrooms are usually the hardest because they collect grease, limescale, soap residue, and hidden grime. Ovens, extractor fans, shower screens, and grout tend to take the most effort.
Should landlords clean carpets before or after repairs?
Usually after the repair work is done, unless the repair itself is likely to create dirt. That way you do not clean twice. It sounds basic, but this is one of those planning details people forget.
How do I know whether a stain is cleaning-related or wear and tear?
Look at the age of the property, the tenancy length, and the type of mark. Light fading or minor flattening may be wear and tear, while heavy staining, residue, or spills are more likely to be cleaning issues.
What should be documented during the final inspection?
Take dated photos, note any cleaning issues, record damage separately, and compare the room condition against the inventory. Good records make later conversations a lot easier and a lot less tense.
Can move-out cleaning help reduce disputes over the deposit?
Yes, a clear and well-documented clean often helps. It gives you evidence of the property's condition and makes it easier to show what was cleaned, what was repaired, and what was left unchanged.
How long does a proper end of tenancy clean usually take?
It varies by property size and condition. A small, tidy flat can be done much faster than a larger home with carpets, heavy kitchen use, or lots of detail work. The important thing is not to rush the final inspection.
What if the property has been left very dirty?
In that case, a standard clean may not be enough. You may need deep cleaning, specialist oven work, carpet treatment, or even after builders style cleaning if the property has accumulated a lot of residue or dust. Better to match the method to the mess.
Where can landlords find related cleaning services for the same property?
Useful options may include oven cleaning, carpet cleaning, window cleaning, and deep cleaning, depending on what the property actually needs. Matching the service to the condition is usually the smartest move.