End of Tenancy Cleaning: A Practical Approach to a Stress-Free Move-Out
Why end of tenancy cleaning matters
End of tenancy cleaning is one of the most important tasks tenants face when moving out of a rental property. It is not just about making a home look tidy; it is about restoring the property to the condition expected under a tenancy agreement, allowing the next occupants to move in comfortably and helping tenants protect their deposit.
Whether you are leaving a flat, house, studio, or shared accommodation, end of tenancy cleaning can influence the final inspection. Landlords and letting agents often expect the property to be presented in a clean, fresh, and well-maintained state. That means more than a quick vacuum and wiping a few surfaces. It often involves deep cleaning kitchen appliances, removing limescale, dusting hard-to-reach areas, and ensuring the entire property looks presentable.
For many people, moving is already stressful. Packing, organizing removals, changing addresses, and managing deadlines can feel overwhelming. That is why end of tenancy cleaning deserves proper attention. Done well, it can reduce friction at checkout, support a smoother handover, and improve the chances of receiving your full deposit back.
What end of tenancy cleaning includes
Unlike regular household cleaning, end of tenancy cleaning is typically a deeper and more detailed process. It covers areas that are often overlooked during daily or weekly cleaning routines. The goal is to clean the entire property thoroughly so it appears fresh, hygienic, and ready for inspection.
Typical tasks in end of tenancy cleaning may include:
- Deep cleaning kitchens, including ovens, hobs, extractor fans, cupboards, and splashbacks
- Scrubbing bathrooms, sinks, toilets, tiles, grout, and mirrors
- Cleaning all floors, carpets, skirting boards, and edges
- Dusting light fittings, shelves, blinds, and fittings
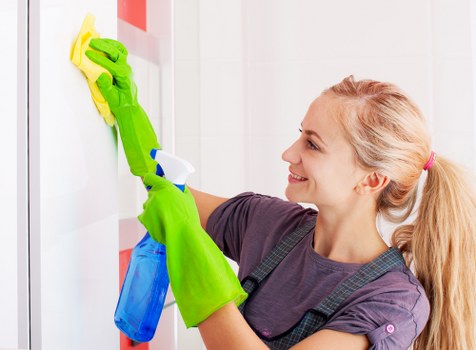
- Wiping doors, handles, switches, and internal windows
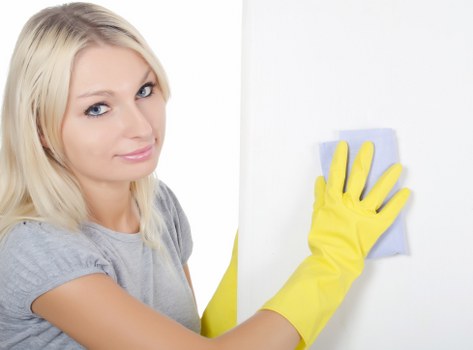
- Removing marks from walls where possible
- Cleaning inside and outside of appliances
In many cases, the property inventory or check-in report will be used as a reference. That means the standard expected for end of tenancy cleaning is often higher than a standard domestic clean. The property should ideally match the condition noted at the start of the tenancy, allowing for reasonable wear and tear.
How to prepare for an end of tenancy clean

Preparation is an essential part of successful end of tenancy cleaning. The more organized you are before cleaning begins, the easier it becomes to complete the job properly. Start by removing all personal belongings from the property, including items from cupboards, drawers, wardrobes, and storage areas.
It is also wise to separate items you plan to discard, donate, or take with you. A clutter-free space allows for more efficient cleaning and helps ensure no hidden dust or dirt is left behind. If you are handling the cleaning yourself, make a checklist so no area is forgotten. A structured plan is especially useful for larger homes or properties with several rooms.
Before beginning end of tenancy cleaning, check the tenancy agreement and any move-out instructions from the landlord or agent. Some properties require professional carpet cleaning or specific appliance standards. Understanding these expectations in advance can help avoid disputes and unnecessary deductions later.
Room-by-room end of tenancy cleaning tips
Kitchen
The kitchen is often the most heavily inspected room during an end of tenancy cleaning check. Grease, food residue, and limescale are common problem areas. Focus on cleaning the oven, hob, extractor fan, sink, taps, cabinet fronts, and inside cupboards. Empty and wipe the fridge and freezer if they are included in the tenancy.
Pay attention to hidden areas such as behind the washing machine or under the cooker. Even small crumbs or spills can create a poor impression. End of tenancy cleaning in the kitchen should leave no lingering smells, sticky surfaces, or visible grease marks.
Bathroom
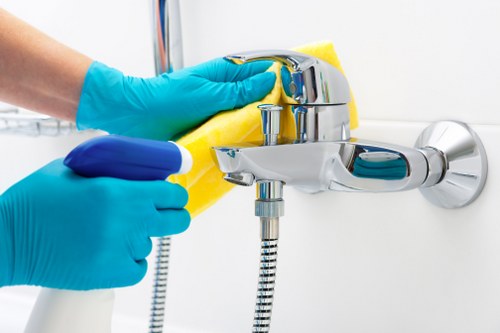
Bathrooms need a deep and hygienic clean. Descale taps, shower heads, glass screens, and tiles. Remove soap scum, clean the toilet thoroughly, and polish mirrors and chrome fixtures. In many end of tenancy cleaning inspections, bathroom cleanliness is closely assessed because hygiene is especially important.
Check for mould in corners, around sealant, and near ventilation points. Clean drains where needed and ensure the room smells fresh. A spotless bathroom can strongly support a positive final inspection.
Living room and bedrooms
In living spaces and bedrooms, the focus is usually on dust removal, vacuuming, and general presentation. Clean skirting boards, window sills, light switches, doors, and radiators. If furniture is included in the tenancy, wipe it carefully and ensure drawers and shelves are empty and clean. End of tenancy cleaning should leave these rooms looking bright and ready for immediate use.
Why professional end of tenancy cleaning can be worth it
Some tenants choose to do end of tenancy cleaning themselves, while others prefer to hire a professional service. Both options can work well, depending on time, budget, and the condition of the property. However, professional cleaners bring experience, equipment, and specialist products that can produce better results in less time.
Professional end of tenancy cleaning is often useful when the property is large, heavily used, or contains problem areas such as ovens, carpets, or stubborn bathroom buildup. Experienced cleaners know what landlords and agents typically look for during inspections, which can reduce the risk of missed spots. They also work systematically, helping ensure a consistent finish across the entire property.
Another advantage is convenience. Moving house involves countless tasks, and outsourcing the cleaning can free up valuable time. Instead of spending hours scrubbing and polishing, you can focus on removals, paperwork, and settling into your new home. For many tenants, that peace of mind makes professional end of tenancy cleaning a smart investment.
Benefits of hiring specialists
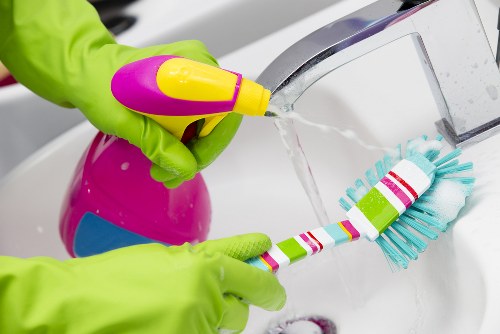
- Access to industrial-grade cleaning tools and products
- Better results on tough stains, grease, and limescale
- More efficient and time-saving than DIY cleaning
- Often aligned with letting agent expectations
- Reduced stress during the moving process
Common mistakes to avoid
Leaving cleaning until the last minute
One of the biggest mistakes in end of tenancy cleaning is waiting until moving day or the final evening to begin. This usually leads to rushed work, overlooked areas, and unnecessary stress. Start early enough to clean room by room, especially if the property is large or your moving schedule is tight.
Ignoring hidden spaces
It is easy to clean visible surfaces and forget hidden areas. However, agents and landlords often check under sinks, behind furniture, inside appliances, and along skirting boards. A proper end of tenancy cleaning routine should include these spots to ensure nothing is left dirty.
Using the wrong products
Some surfaces need gentle products, while others require stronger degreasers or descalers. Using the wrong cleaner can damage fixtures or leave streaks behind. Always read product labels and test on a small area if necessary. The aim of end of tenancy cleaning is to improve the property, not create new damage.
Another common issue is forgetting external areas if they are included in the tenancy, such as balconies, patios, or storage units. If they form part of the rented space, they should be cleaned too. Paying attention to the full scope of the property helps avoid avoidable deductions.
How to create an effective cleaning checklist
A well-organized checklist is one of the most useful tools for end of tenancy cleaning. It keeps the process manageable and helps ensure nothing is missed. Whether you are cleaning on your own or hiring help, a checklist can reduce stress and improve results.
Start by listing every room and then breaking each one down into tasks. For example, a kitchen list might include cleaning the oven, wiping cupboard interiors, polishing taps, and mopping the floor. A bathroom list might include descaling the shower, cleaning grout, scrubbing the toilet, and polishing mirrors. This detailed approach makes end of tenancy cleaning much easier to track.
You can also organize tasks by priority. Begin with the dirtiest or most time-consuming areas, then finish with dusting, vacuuming, and final touch-ups. A checklist helps you stay on schedule and ensures the property is left in the best possible condition.
Example checklist categories
- Kitchen appliances and surfaces
- Bathrooms and toilets
- Floors, carpets, and rugs
- Windows, frames, and sills
- Doors, switches, and handles
- Storage spaces and cupboards
- Final inspection walk-through
End of tenancy cleaning and deposit protection
One of the main reasons tenants invest time and effort into end of tenancy cleaning is the deposit. At the end of a tenancy, the landlord or agent may inspect the property and compare its condition against the original inventory. If the property has not been cleaned adequately, they may propose deductions to cover cleaning or restoration.
While end of tenancy cleaning cannot eliminate every possible issue, it can significantly reduce the chance of disputes. Clean surfaces, fresh bathrooms, and a well-maintained kitchen show care and responsibility. That can make a positive difference during checkout.
It is important to remember that fair wear and tear is usually separate from cleaning issues. A tenant is generally not expected to repair every sign of normal living, but they are expected to return the property in a clean condition. Understanding this difference helps keep expectations realistic and prevents unnecessary arguments.
DIY vs professional end of tenancy cleaning
There is no single correct answer when choosing between DIY and professional end of tenancy cleaning. The best option depends on your schedule, cleaning confidence, and the property’s condition. If the property is small and already well-maintained, cleaning it yourself may be practical and cost-effective.
However, DIY cleaning often takes longer than expected. People underestimate how much work is involved in deep-cleaning ovens, bathrooms, skirting boards, and neglected corners. For busy tenants, hiring professionals can be a better use of time and energy. With expert end of tenancy cleaning, you are more likely to achieve a consistent, inspection-ready finish.
Budget is also a factor. Professional cleaning has a cost, but it may be outweighed by the time saved and the reduced likelihood of deposit deductions. Many tenants find that paying for quality cleaning services is worthwhile, especially if the tenancy agreement includes strict cleanliness expectations.
Questions to ask before choosing
- How much time do I have before checkout?
- What condition is the property currently in?
- Does the tenancy agreement require professional cleaning?
- Are there appliances or carpets that need specialist attention?
- Would hiring help reduce stress and risk?
How to make the property inspection-ready
An inspection-ready property should feel clean, neutral, and well cared for. In end of tenancy cleaning, the final details matter as much as the major jobs. Once the main cleaning is complete, walk through each room and look for fingerprints, dust, streaks, or missed marks.
Open cupboards and drawers to confirm they are empty and clean. Check around taps, under sinks, and behind doors. Make sure bins are emptied, floors are vacuumed or mopped, and all surfaces are dry. Even after a thorough end of tenancy cleaning, small finishing touches can improve the overall presentation.
Natural light can highlight dust and streaks, so inspect rooms during the day if possible. Look at mirrors, windows, and glass surfaces from different angles. A careful final check can make a meaningful difference during the handover.
Practical cleaning order for better results
When tackling end of tenancy cleaning, the order in which you clean matters. A logical sequence can save time and prevent re-cleaning areas that have already been finished. A useful rule is to work from top to bottom and from the furthest room toward the exit.
Start with dusting high areas like shelves, light fittings, and tops of cupboards. Then move to surfaces, fixtures, and appliances. Finish with floors so dust and debris can be removed last. This approach makes end of tenancy cleaning more efficient and helps maintain a tidy working process.
For larger properties, divide the work into phases. For example, clean bedrooms and living areas on one day, then kitchens and bathrooms on another. That makes the workload feel more manageable and reduces the chance of burnout.
Simple order to follow
- Declutter and remove personal belongings
- Dust top surfaces and fixtures
- Clean walls, doors, and switches
- Tackle kitchen and bathroom deep cleaning
- Vacuum and mop all floors
- Complete a final room-by-room inspection
Final thoughts on end of tenancy cleaning
End of tenancy cleaning is more than a final chore. It is an important part of moving out responsibly, protecting your deposit, and leaving the property in good condition for the next occupants. With the right planning, the process becomes much more manageable and far less stressful.
Whether you choose to clean yourself or hire professionals, the key is thoroughness. Focus on the kitchen, bathroom, floors, hidden corners, and all high-touch surfaces. Use a checklist, allow enough time, and pay attention to the details that matter during the final inspection. A careful end of tenancy cleaning routine can save time, reduce disputes, and create a smoother moving experience.
If you are preparing to move soon, now is the perfect time to start organizing your cleaning plan. Contact us today or book your service now to make your move-out process easier, cleaner, and more efficient. A well-executed end of tenancy cleaning helps you leave on the best possible terms and move forward with confidence.